
This is probably the most common question we get asked, so we thought we would share this information with you. The reason it’s such a big deal is because if you are running multiple versions of windows server then you will need to update them before they can talk to each other.
If you don’t do this you will get an error message saying that there is no communication between the servers.
So how does one go about doing this? Well, there are 2 ways; either you can upgrade all the computers together (which means you have to wait for everyone) or you can do a clean installation of a fresh copy of windows server and reinstall the software you want on each computer.
To do this we used the following steps:
Step One – Run Disk Management in Task Manager
Press CTRL+SHIFT+ESC to open up Task manager. This should bring you directly to disk management.
Now click the small arrow on the right hand side of the screen to expand the view.
How to Install Ssd in Laptop
Transferring Data to Your New Hard Drive
If you buy a new hard drive, then it’s worth transferring any files that you don’t need from your old hard drive to the new one.
If you do this properly, you will be able to keep all your files safe and you won’t lose them. However, if you just copy all your stuff into your new hard drive, you run the risk of losing important information.
To avoid this happening, there are many ways that you can back up your files. One way is to use an external USB hard drive which will help you save your files safely.
External drives come in two main forms. The first type uses a traditional USB connection. These are ideal for storing large amounts of data because they have lots of space.
An example of this would be a 1TB portable hard disk drive. This works very well as long as you have enough free ports on your computer. Here is guide about Best SSD For Photographers.
The second form of external storage device is more secure than the previous one. Instead, you use a wireless network connection.
Precautions Before Installation
There are several things that you need to consider when installing a new piece of technology into your network. The most important thing to remember is to back up the data on the computer, especially if it’s connected to a web-based service.
If you don’t do this, then there’s a good chance that your system can be damaged or lost. Another thing you should keep in mind is that your hard drive might not work properly.
In order to avoid this problem, you can run the disk check utility to see whether the file system is corrupted.
If this doesn’t solve the issue, you can try replacing your hard drives with other compatible ones.
You also need to make sure that you have a stable internet connection. This means that you need to be able to access the Internet for more than 30 days without being interrupted.
After you’ve checked all these items off the checklist, you should now proceed with the actual installation process.
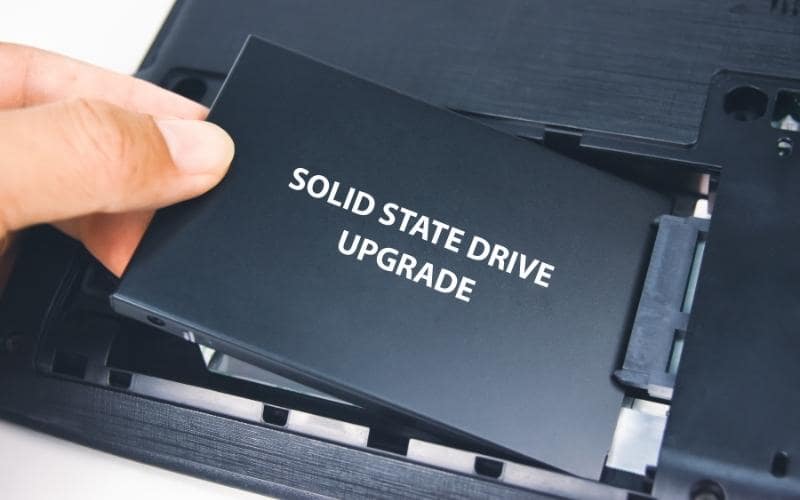
Connect the SSD
If you own a laptop, you probably need a solid state drive, otherwise known as a SSD. An SSD is much faster than a traditional HDD. It’s also lighter and more energy efficient.
Unfortunately though, there are few cases where you can take advantage of an SSD without buying a whole new laptop. However, this isn’t always the case. If you want to save on your next laptop purchase, here are five ways to do it.
Steps 1 & 2. Inserting The SSD
The first thing you will want to do is open up your PC. You can find a guide for doing so in our previous post. Once inside, look around until you spot the power cable. Then plug that into the wall socket and wait for a while.
While you’re waiting you’ll want to ensure you have access to the SATA port. To do this, you need to remove the bottom cover of your laptop.
There should be a screwdriver under there somewhere. Use that to remove the plastic tab that covers the SATA connector. For more about tech https://computertechlife.com/
Laptop SSD Installation Instructions
You will need to connect the power supply to the main board and turn it on. The most common connection method is using a SATA port.
To do this, you will firstly need to remove the cover from the front panel, then open up the rear side of your laptop and unplug any cables that are connected to your laptop’s motherboard.
Next, disconnect the AC adaptor from your computer and insert the power cable into the plug hole located at the bottom left corner of your laptop. Then, connect the other end of the power cord to an available outlet.
Then, hold down both the Fn and Ctrl keys simultaneously until the LED lights flash.
Afterwards, release them, but don’t let go yet. Next, press the F10 key, which should trigger a boot menu.
Now, select your Boot option. This is usually found under Advanced Options or UEFI Setup Utility in Windows 10.
Prepare Your Current Drive for Cloning
If you’ve been following our blog series on Hard Disk Cloning, you probably already know that it’s possible to clone a HDD. In this guide we’re going to give you some tips and advice that will help you prepare your current HDD for cloning.
First of all you need to install an operating system onto the cloned drive. If you’re not sure how to do this then read our guide on getting started with hard disk cloning.
Once your computer has installed an operating system, you can create a backup of the entire contents of your existing drive using either Windows Backup or Mac Time Machine.
Next, you can use a utility such as GPT Clone or EaseUS Partition Master to copy all of the partitions off your old HDD into a single file.
When this is complete, you can burn this file to a DVD and then insert it back in to your computer, overwriting the original partition table.
You should now have a new HDD with a fresh copy of your operating system, including the full set of drivers needed to support your hardware. Here is mukadvice.com
Related Guide