
How to Draw A Bald Eagle. The bald eagle is one of the numerous magnificent birds on the earth. These graceful birds of the target are not only efficient vampires but also the national bird of the United States.
Also, check our Unicorn Coloring Pages.
They came to represent patriotism and pride in America, and many fondly remember them by learning to draw a bald eagle.
If you are one of these people, you are definitely on the right track! Once you’ve finished this directory, you’ll see how comfortable and fun it can be to tauten one of these majestic birds.
For this first step of our bald eagle drawing guide, use a light pencil to mark some stripes that will direct you through the rest of the image.
This step will be much easier if you follow the reference image exactly to Draw A Bald Eagle.
How to Draw A Bald Eagle
Step 1
For this first step of our bald eagle drawing guide, use a light pencil to mark some stripes that will direct you through the rest of the image.
This step will be much easier if you follow the reference image exactly to Draw A Bald Eagle.
By accurately referencing the reference image, you can draw rough shapes that will form the basis of the outlines in future steps.
These guidelines form the eagle’s head, neck, wings, body, and talons.
Once you keep these pencil stripes, you can use the pen to review the pencil lines with finer lines for the final drawing. First, draw the top of the head and beak for this step.
To continue the previous step, you can extend the pen lines for the remaining outline of the hairless eagle drawing.
As you can see in the contact image, you can extend the lines for the wings, tail, claws, and other areas to Draw A Bald Eagle.
Step 2
To continue the previous step, you can extend the pen lines for the remaining outline of the hairless eagle drawing.
As you can see in the contact image, you can extend the lines for the wings, tail, claws, and other areas to Draw A Bald Eagle.
You can focus on the background elements, as we’ll be adding some interior details shortly. Once you’re happy with the outline of the pen, you’re ready for step 3!
In this step of our guide to drawing a bald eagle, you’ll add internal detail to your graphic.
Step 3
In this step of our guide to drawing a bald eagle, you’ll add internal detail to your graphic. To do this, you can create some hard lines on the neck for some feathery elements. Then you can add another rough stripe across the bottom of the tail for more feather detail to Draw A Bald Eagle.
Focusing on the face, you can now use a few simple circle shapes to draw an eye. Then you can use a smartly curved stripe across it to give the eagle a focused look.
Step 4
Continuing the points for your eagle picture, you can now draw some face and claw details to finish it nicely.
Focusing on the face, you can now use a few simple circle shapes to draw an eye. Then you can use a smartly curved stripe across it to give the eagle a focused look.
Then you can finish the beak to complete the head. Then just a few more details must be added before proceeding to Draw A Bald Eagle.
This step may seem complicated, but if you follow the steps and do it slowly, you will make it!
The main elements you will add mainly include some details of feathered wings. You can achieve this look by adding rows of curved lines to create feathered wings.
First, you can finish the toes and nails of the eagle’s talons. Then you can add some curved lines to the inner wings to start the feather details.
Once you’ve drawn all these elements, it’s time to finish some final details to Draw A Bald Eagle!
Step 5
In this fifth step of our guide to drawing a bald eagle, you’ll add the final details before finishing with some colors.
This step may seem complicated, but if you follow the steps and do it slowly, you will make it!

The main elements you will add mainly include some details of feathered wings. You can achieve this look by adding rows of curved lines to create feathered wings.
Then you can add some final touches to areas like the legs and tail and other areas throughout the eagle to complete it Draw A Bald Eagle.
Once you’ve finished all the details, we added to our eagle, feel free to make this image even better by adding your own!
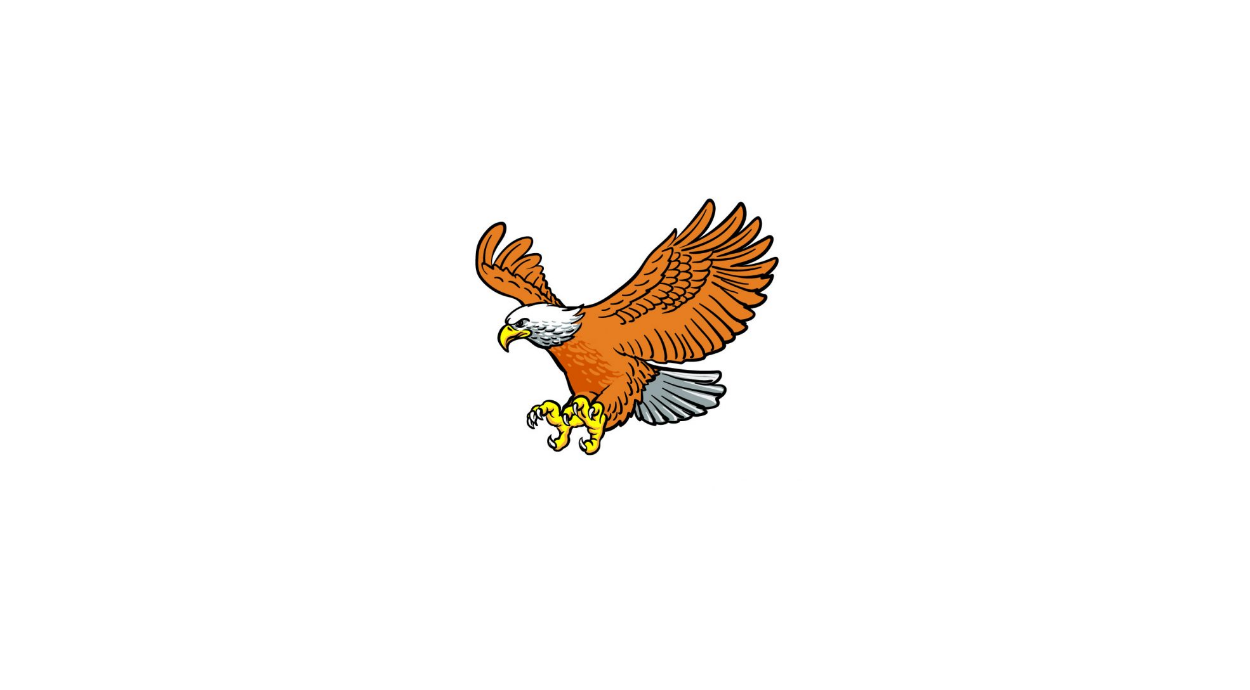
Step 6 of our guide is about adding some nice colors to the bald eagle drawing. In our reference image, we chose the typical colors of a bald eagle.
These colors include brown, yellow, white, and gray for a more realistic look. If you want to achieve a realistic look like this, you can tweak it a little more!
This may include using different shades of these colors or tweaking them a bit.
You can do this by adding or removing details on the eagle, adding your details, or designing a stunning background.
Step 6
Step 6 of our guide is about adding some nice colors to the bald eagle drawing. In our reference image, we chose the typical colors of a bald eagle.

These colors include brown, yellow, white, and gray for a more realistic look. If you want to achieve a realistic look like this, you can tweak it a little more to Draw A Bald Eagle!
This may include using different shades of these colors or tweaking them a bit.
Once you have drawn a background for your picture, you can add more touches of color to this element.
You can also get some color variations by changing your art media. Watercolors and colored pencils can add a softer feel to an image so that they would work well for an image like this to Draw A Bald Eagle.
Your Bald Eagle Drawing is Finished!